Sunday, October 23, 2016

Qidi Avatar IV, OrangePi Lite and OctoPrint

Pre-condition: I have configured a user named 'user' with the home folder '/home/user', and I'm running on armbian 3.4.112 (see previous post for the setup).

Installation of OctoPrint
Here are a bunch of commands to install python and python-dev (it should work with apt-get, but at the time of writing some libs with the right version are missing in the repositoy, and I couldn't get it using exact this version)
---cut here begin---
cd /home/user/

wget http://ftp.us.debian.org/debian/pool/main/p/python2.7/python2.7-dev_2.7.9-2+deb8u1_armhf.deb
wget http://ftp.us.debian.org/debian/pool/main/p/python2.7/python2.7_2.7.9-2+deb8u1_armhf.deb
wget http://ftp.us.debian.org/debian/pool/main/p/python-defaults/libpython-stdlib_2.7.9-1_armhf.deb
wget http://ftp.us.debian.org/debian/pool/main/p/python2.7/python2.7-minimal_2.7.9-2+deb8u1_armhf.deb
wget http://ftp.us.debian.org/debian/pool/main/p/python-defaults/python-minimal_2.7.9-1_armhf.deb
wget http://ftp.us.debian.org/debian/pool/main/p/python-defaults/python_2.7.9-1_armhf.deb
wget http://ftp.us.debian.org/debian/pool/main/p/python2.7/libpython2.7-minimal_2.7.9-2+deb8u1_armhf.deb
wget http://ftp.us.debian.org/debian/pool/main/p/python2.7/libpython2.7-stdlib_2.7.9-2+deb8u1_armhf.deb
wget http://ftp.us.debian.org/debian/pool/main/p/python2.7/libpython2.7_2.7.9-2+deb8u1_armhf.deb
wget http://ftp.us.debian.org/debian/pool/main/e/expat/libexpat1-dev_2.1.0-6+deb8u3_armhf.deb
wget http://ftp.us.debian.org/debian/pool/main/g/glibc/multiarch-support_2.19-18+deb8u6_armhf.deb
wget http://ftp.us.debian.org/debian/pool/main/p/python2.7/libpython2.7-dev_2.7.9-2+deb8u1_armhf.deb
wget http://ftp.us.debian.org/debian/pool/main/p/python-defaults/libpython-dev_2.7.9-1_armhf.deb
wget http://ftp.us.debian.org/debian/pool/main/p/python-defaults/python-dev_2.7.9-1_armhf.deb

dpkg -i libpython2.7-minimal_2.7.9-2+deb8u1_armhf.deb
dpkg -i libpython2.7-stdlib_2.7.9-2+deb8u1_armhf.deb
dpkg -i multiarch-support_2.19-18+deb8u6_armhf.deb
dpkg -i libpython2.7_2.7.9-2+deb8u1_armhf.deb
dpkg -i libexpat1-dev_2.1.0-6+deb8u3_armhf.deb
dpkg -i libpython2.7-dev_2.7.9-2+deb8u1_armhf.deb
dpkg -i libpython-dev_2.7.9-1_armhf.deb
dpkg -i python2.7-minimal_2.7.9-2+deb8u1_armhf.deb
dpkg -i python-minimal_2.7.9-1_armhf.deb
dpkg -i libpython-stdlib_2.7.9-1_armhf.deb
dpkg -i python2.7_2.7.9-2+deb8u1_armhf.deb
dpkg -i python_2.7.9-1_armhf.deb
dpkg -i python2.7-dev_2.7.9-2+deb8u1_armhf.deb
dpkg -i python-dev_2.7.9-1_armhf.deb
rm *.deb
---cut here end---

Installation of additional packages, set of user permissions and initial run of OctoPrint:
---cut here begin---
apt-get install python-pip python-setuptools python-virtualenv git libyaml-dev build-essential
apt-get autoremove
pip install virtualenv --upgrade
usermod -a -G tty user
usermod -a -G dialout user

su - user
git clone https://github.com/foosel/OctoPrint.git
cd OctoPrint
virtualenv venv
./venv/bin/python setup.py install
 /home/user/OctoPrint/venv/bin/octoprint
---cut here end---

Additional configuration
The OctoPrint server will start on port 5000, in my case it is 'http://192.168.0.5:5000'. Setup username and password, then login.
For the Qidi Avatar (or Makerbot or any Makerbot clone) follow these steps (as the serial port doesn't understand the standard G-code but only a binary language called x3g):
Go to 'Settings', 'Plugin Manager', get to 'Get more...' plugins and search for 'GPX' in order to install the GPX plugin.
Go to 'Setting', select the 'GPX' plugin and select your printer, for the Qidi Avatar IV it's the 'Replicator 1 - dual extruder', this will create the file '/home/user/.octoprint/data/GPX/gpx.ini'.

Go to 'Settings, 'Printer profile', click on edit and adjust the profile, for the Qidi Avatar IV:
Model: Qidi Avatar IV
Origin: Center
Volume X: 230mm
Volume Y: 145mm
Volume Z: 150mm
Number of Extruders: 2


Connect the OrangePi with an USB cable to your printer, and set the serial port name and speed. For the Qidi Avatar it is '/dev/ttyACM0' with a baudrate of '115200'. (You can check the name of the serial ports availabe over the ssh session, type 'dmesg | grep tty' to get the name of the serial port).

Autostart OctoPrint

Edit the file '/home/user/OctoPrint/scripts/octoprint.init', adjusting 'DEAMON':

DAEMON=/home/user/OctoPrint/venv/bin/octoprint

Edit the file '/home/user/OctoPrint/scripts/octoprint.default', adjusting 'OCTOPRINT_USER' and 'DEAMON':
OCTOPRINT_USER=user
DAEMON=/home/user/OctoPrint/venv/bin/octoprint

Copy these two files to the standard startup directories and automatic startup for OctoPrint:
---cut here begin---
cp /home/user/OctoPrint/scripts/octoprint.init /etc/init.d/octoprint
chmod +x /etc/init.d/octoprint
cp /home/user/OctoPrint/scripts/octoprint.default /etc/default/octoprint
update-rc.d octoprint defaults
---cut here end---

To manually start, restart, stop OctoPrint simply execute:
---cut here begin---
 service octoprint start
service octoprint restart
service octoprint stop
---cut here end---

Printing
Upload a G-code file to octoprint and then print it.

Note:
The Qidi Avatar (and other Makerbot clones) can't read or write to the SD card, due to firmware limitations. Therefore it is not possible to upload or download files on the SD card.
It should be possible to print x3g files directly from the SD card, but you won't be able to see any progress indicator and you won't be able to visualize the G-code as there's none. I didn't try this, I prefer handling G-code files over x3g, and I prefer a wireless web-interface over for printing over physical knobs.

Saturday, October 22, 2016

OrangePi Lite - armbian wifi/wlan setup

Orange Pi Lite:
While not listed on www.orangepi.org/ it is available on www.aliexpress.com/ for $14.44 incl. shipping.

I selected this model because it has build-in Wifi. I don't have an network cable at the printer and therefore I will use Wifi.

Armbian:
Availabe at www.armbian.com/ as desktop or server version, I selected the server version without X server.
Version used: Armbian_5.20_Orangepilite_Debian_jessie_3.4.112.7z

Initial setup:
Download the armbian image archive and write the unpacked image to a microSD card (I used Etcher www.etcher.io to write the image). Then put the card into the orangepi, connect a usb keyboard and a HDMI display, and power it up.
It will show a boot prompt shortly, do not log in! armbian is setting up disk size and a swap partition in the background, you'll have to wait a few minutes (depending on the microSD card speed) until it reboots. Then you can log in as root with the password 1234. It will promt you to change the root password and to set up an additional user. I selected the login name 'user'.

Wifi setup:
The first thing you might want to setup if Wifi, and then you can do all further configuration over ssh, and it has quite a few steps, in my case the SSID in named 'mySSIDhere', just replace it with yours:
Test if the wlan adapter is working at all:
root@orangepilite:~# iw dev
 phy#0
     Interface wlan0
         ifindex 3
         type managed
 root@orangepilite:~# 
Set your country specific WLAN profile (for the UK it's GB, as in this example). A list of all country codes is at the time of writing available at en.wikipedia.org/wiki/ISO_3166-1_alpha-2 - otherwise google for ' ISO / IEC 3166 alpha2 country code' (replace with your country code):
root@orangepilite:~# iw reg set GB

Bring the adapter up:
root@orangepilite:~# ip link set dev wlan0 up 
Scan for access points (without the grep it will display a lot more info):
root@orangepilite:~# iw dev wlan0 scan | grep SSID
     SSID: mySSIDhere
If your access point isn't using encryption you can connect already:
root@orangepilite:~# iw dev wlan0 connect mySSIDhere 
Check a few times until the connection is there, either it says 'Not connected' or it shows an info like this:
root@orangepilite:~# iw dev wlan0 link
 Connected to 00:00:00:00:00:00 (on wlan0)
     SSID: mySSIDhere
     freq: 2472
     signal: -72 dBm
     tx bitrate: 150.0 MBit/s
 root@orangepilite:~#
Get an IP addresss over DHCP (I'm assuming you're using DHCP on your Wifi network, as most users do):
root@orangepilite:~# dhclient -v wlan0 


If your access point is configured with WPA it's a little bit more complicated, replace myPasswordHere with the actual password:
root@orangepilite:~# wpa_passphrase mySSIDhere myPasswordHere >/root/wpa.conf
 
   root@orangepilite:~# cat /root/wpa.conf
   network={
       ssid="mySSIDhere"
       #psk="myPasswordHere"
       psk=04817c03bb5fd9d1c6d561a881f192da77501b47d0ac80598eb44191c603c516
   }
   root@orangepilite:~#  
 Check a few times until the connection is there, either it says 'Not connected' or it shows an info like this:
root@orangepilite:~# iw dev wlan0 link
   Connected to 00:00:00:00:00:00 (on wlan0)
       SSID: mySSIDhere
       freq: 2472
       signal: -72 dBm
       tx bitrate: 150.0 MBit/s
   root@orangepilite:~#
Get an IP addresss over DHCP (I'm assuming you're using DHCP on your Wifi network, as most users do):
root@orangepilite:~# dhclient -v wlan0 


Now it's time to test if ssh is working, figure out your ip address with ifconfig and test ssh. I got IP address 192.168.0.5 and connected with it:
ifconfig wlan0 
 wlan0 Link encap:Ethernet HWaddr 00:00:00:00:00:00 
 inet addr:192.168.0.5 Bcast:192.168.0.255 Mask:255.255.255.0 
 [...] 
  
 root@orangepilite:~# ssh 192.168.0.5 
 root@192.168.1.108's password: 

  ___                               ____  _   _     _ _
 / _ \ _ __ __ _ _ __   __ _  ___  |  _ \(_) | |   (_) |_ ___
| | | | '__/ _` | '_ \ / _` |/ _ \ | |_) | | | |   | | __/ _ \
| |_| | | | (_| | | | | (_| |  __/ |  __/| | | |___| | ||  __/
 \___/|_|  \__,_|_| |_|\__, |\___| |_|   |_| |_____|_|\__\___|
                       |___/
  
 Welcome to ARMBIAN Debian GNU/Linux 8 (jessie) 3.4.112-sun8i 
 System load: 0.02 Up time: 2 hours Local users: 3 
 Memory usage: 12 % of 494Mb IP: 192.168.1.108 
 CPU temp: 61°C 
 Usage of /: 9% of 15G 
  
 root@orangepilite:~#

Now you can switch to your PC and connect with ssh (on Windows you can use putty (free, www.putty.org), MobaXter (free for personal use, mobaxterm.mobatek.net), SecureCRT ($99, www.vandyke.com) or any other ssh client).

The most important thing is to write the Wifi settings into the configuration file '/etc/network/interfaces', so here it goes (without the use of editors like vi or nano). :
root@orangepilite:~# cat /root/wpa.conf
network={
        ssid="mySSIDhere"
        #psk="myPasswordHere"
        psk=04817c03bb5fd9d1c6d561a881f192da77501b47d0ac80598eb44191c603c516
}
Prepare a text document that you can easily copy and paste with the following contents (replacing the text behind wpa-ssid and wpa-psk with the values from your '/root/wpa.conf':
echo "# Local loopback
auto lo
iface lo inet loopback

# Wlan

auto wlan0
iface wlan0 inet dhcp
        wpa-ssid        mySSIDhere
        wpa-psk         04817c03bb5fd9d1c6d561a881f192da77501b47d0ac80598eb44191c603c516
" > /etc/network/interfaces
Then select it all, copy it and paste it over to your ssh session:
root@orangepilite:~# echo "# Local loopback
auto lo
iface lo inet loopback

# Wlan
auto wlan0

iface wlan0 inet dhcp
        wpa-ssid        mySSIDhere
        wpa-psk         04817c03bb5fd9d1c6d561a881f192da77501b47d0ac80598eb44191c603c516" > /etc/network/interfaces
root@orangepilite:~#

The county code is to be written to a config file '/etc/default/crda' as well, so here it goes (replace with your country code):
 root@orangepilite:~# echo "REGDOMAIN=GB" > /etc/default/crda

All config files are written, so it's time to reboot in order to test it:
root@orangepilite:~# sync
root@orangepilite:~# reboot
If you didn't make any errors you can connect with ssh to the orangepi after this reboot.

Friday, May 6, 2016

Qidi Avatar IV - Camera holder for a WiFi FPV camera (SYMA X5SW camera)

Here is just another camera holder for my 3D printer, the Qidi Avatar IV. It's for the SYMA WiFi camera that is used on the SYMA X5SW quad copter, that is available as spare part for around USD 20 or EUR 20.
It'll hang into the metal frame, and the camera is to be glued to the diagonal part - that is a little short but the camera weights almost nothing.

STL on github:
https://github.com/maze1980/qidi_syma_fpv


A note regarding the power supply for the camera: It's a 3.6V camera.
I use a USB power supply for cars (that runs from 12V to 40 V) connected to the printer (24V). The  5V output is connected to the camera with two diodes (1N4007) in series. The voltage drop per diode is around 0.7V, and the camera is supplied with 3.6V. That's far from perfect but it works.

And a final note: Check the angle of the camera before you glue it - if you print only small parts you might want to lower it a little bit.

Saturday, February 20, 2016

Controling the I2C bus with AutoIT with the CH341 or CH341A USB chip

If I only knew of the lack of documentation I wouldn't have bought the chip maybe - but I wanted a simple solution to connect I2C devices to the PC. There's a board available with this chip for $10 to $15 incl. shipping usually (ebay or aliexpress, "usb i2c").  It's often called "ALL IN 1 Multifunction USB to SPI/I2C/IIC/UART/TTL" and supports both 3.3V and 5V. It comes without any driver or documentation. The manufacturer WCN/Winchiphead offers a lot of downloads including drivers, basic documentation (only available in Chinese) and sample code (not very well documented, all comments are Chinese again) - enough to get started.
It works as single master on the I2C bus, that's OK for over 99% of the use cases. Slave mode is not supported and it's save to assume that a multi-master setup isn't supported as well, so if you need these functions you'll have to find another solution.
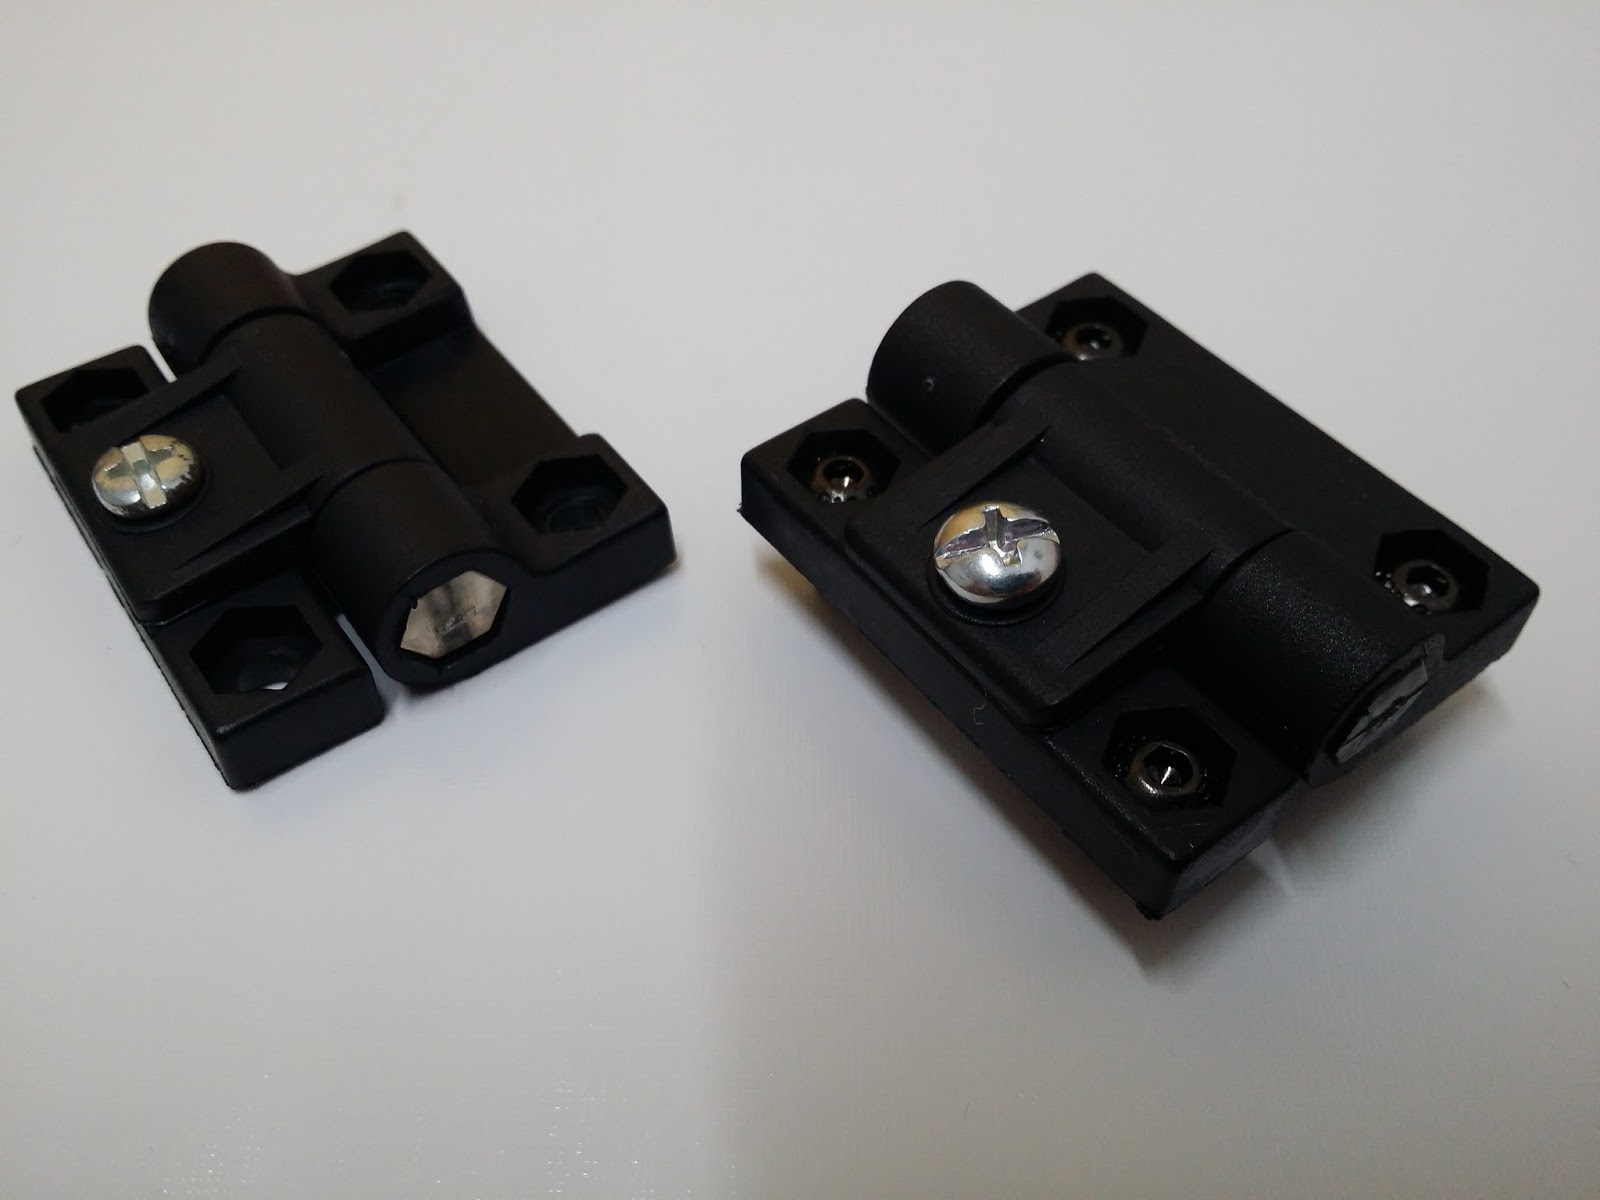
The USB to SPI/I2C/IIC/UART/TTL/ISP Serial Adapter Module

On the top there are a 12 MHz quartz, a CH314A converter chip, two LEDs, four jumpers a a lot of connectors, and on the bottom are a few resistors and capacitors and a  AMS1117-3.3 voltage regulator chip to supply 3.3 volts.

Who needs more documentation?


The jumpers are more or less self-explaining. It's important to set the signal voltage level select jumpers as a pair, not individually. The external supply voltage jumper sets the voltage supplied at the VCC pin to either to 5V fix or to the voltage that is selected by the signal voltage level select jumpes, i.e. 3.3V or 5V depending on the jumper positions.

Windows driver with 64bit installer:
ch341a.zip (Source: http://www.abacom-online.de/div/ch341a.zip)
  Folder: .\Driver\CH341_EPP_MEM_I2C_IO\
The 64 bit installer should show:
WCH.CN
  |__ USB-EPP/I2C... CH341A
      |__ 06/05/2009, 2.2.2009.06

Windows 32 bit installer:
CH341SER.ZIP  (Source: http://wch.cn/downfile/5) with 32bit and 64bit installer
Download this file only if you need a 32 bit installer, but do not install the included driver. Use the driver supplied with the 64bit installer linked above.

API documentation: CH341DS2.PDF (Source: http://wch.cn/downfile/24)

A mirror for these files: https://drive.google.com/drive/folders/0B1xSSg6lZlzaR1BlSVNKLUhwRDQ?resourcekey=0-D_lXKzjEfqGHlsmPNmZ5aw&usp=sharing

 
After installing the driver and plugging in the device configured as IIC/SPI and you'll see it in the device manager:

A screenshot of the Device Manager with the device.
When configured as IIC/SPI device it's a unique interface device, so you'll have to write your own program to use this device. Here's a short list of the necessary functions for I2C only, based on a translation of the API documentation and corrected based on the provided examples and my own tests. Basically you'll need only four functions:
  • CH341OpenDevice - initialize the device
  • CH341SetStream - set the I2C speed
  • CH341StreamI2C - read and/or write data 
  • CH341CloseDevice - close the device
The functions CH341ReadI2C and CH341WriteI2C are very limited in their functionality, so I suggest to always use CH341StreamI2C instead. I have them here in the list just for the sake of completeness. Here's the API description:

//************************
//CH341OpenDevice
//
/*
Call the function CH341OpenDevice once before calling other functions.
*/
HANDLE WINAPI CH341OpenDevice(      // open CH341 device, return a handle
  ULONG iIndex                      // id of the USB device
);
/*
If the returned number is smaller then zero the device couldn't be opened.
*/


//************************
//CH341CloseDevice
//
/*
Call the function CH341CloseDevice to close the device.
*/
VOID CH341CloseDevice(              // close the CH341 device
  ULONG iIndex                      // id of the USB device
);


//************************
//CH341SetStream
// 
/*
Call the function CH341SetStream once to set the data rate.
*/
BOOL WINAPI CH341SetStream(         // configure the serial flow mode
  ULONG iIndex,                     // id of the USB device
  ULONG iMode                       // specify the mode, see below
); 
/*
// Bit 1,0: I2C interface speed / SCL frequency
//    00 = low / 20KHz
//    01 = standard / 100KHz (default)
//    10 = fast / 400KHz
//    11 = High Speed ​​/ 750KHz
// Bit 2: SPI's I / O Number / IO pin
//    0 = single-input single-output (D3 clock / D5 out / D7 into) (default)
//    1 = double into a double (D3 clock / D5 out D4 a / D7 D6 enter into)
// Bit 7: SPI byte bit order
//    0 = LSB first
//    1 = MSB first
// Other Reserved, must be 0
// To sum this up: Set iMode to 0, 1, 2 or 3 for 20, 100, 400 or 750 kHz.
*/


//************************
//CH341ReadI2C
// 
/*
Call this function to write and read one byte from a slave device on
the I2C bus.
*/
BOOL WINAPI CH341ReadI2C(           // read data
  ULONG iIndex,                     // id of the USB device
  UCHAR iDevice,                    // I2C device address (7 bits)
  UCHAR iAddr,                      // I2C device register (writes one byte)
  PUCHAR oByte                      // I2C data (reads one byte)
);


//************************

//CH341WriteI2C
// 
/*
Call this function to write two bytes of data on the I2C bus.
*/  
BOOL WINAPI CH341WriteI2C(          // write data
  ULONG iIndex,                     // id of the USB device
  UCHAR iDevice,                    // I2C device address (7 bits) 
  UCHAR iAddr,                      // I2C device register (writes first byte)
  UCHAR iByte                       // I2C data (writes second byte)
);


//************************
//CH341StreamI2C
// 
/*
Call this function to read, write, or write and read a specified amount of
bytes on the I2C bus. Read length or write length can be set to zero

BOOL WINAPI CH341StreamI2C(         // read/write data
  ULONG iIndex,                     // id of the USB device
  ULONG iWriteLength,               // length of the data (bytes to write)
  PVOID iWriteBuffer,               // pointer to the data
  ULONG iReadLength,                // length of the data (bytes to read)
  PVOID oReadBuffer                 // pointer to the data
);
/*
This function provides all functionality of CH341ReadI2C and CH341WriteI2C
plus much more flexibility. It's not that elegant because you have to prepare
the iWriteBuffer with the device address that is shifted by one bit to the
left by yourself (the least significant bit will be controlled by the chip
for read (1) and write (0) access automatically).
*/
 
Putting this all together in an undocumented test script for AutoIT:
#include <WinAPISys.au3>

;device ID
$id = 0


;open the dll
$dll = DllOpen("C:\Windows\System32\CH341DLL.DLL")
If $dll  <> -1 Then
   ConsoleWrite ("DllOpen: OK" & @CRLF)
Else
   ConsoleWrite ("DllOpen: Error, could not open the dll." & @CRLF)
   Beep(1000, 5000)
   Exit
EndIf

;open the device
$aResult = DllCall($dll, "BOOL", "CH341OpenDevice", "ULONG", $id)
If  $aResult[0] <> -1 Then
   ConsoleWrite ("CH341OpenDevice: OK" & @CRLF)
Else
   ConsoleWrite ("CH341OpenDevice: Error: Could not open device " & @CRLF)
   Beep(1000, 5000)
   Exit
EndIf

;set the I2C speed
$iMode = 0
$aResult = DllCall($dll, "BOOL", "CH341SetStream", "ULONG", $id, "ULONG", $iMode)
If  $aResult[0] Then
   ConsoleWrite("CH341SetStream: OK" & @CRLF)
   ConsoleWrite("  Param: $id="& $id & ", $iMode=" & $iMode & @CRLF)
Else
   ConsoleWrite("CH341SetStream: Error" & @CRLF)
   ConsoleWrite("  Param: $id="& $id & ", $iMode=" & $iMode & @CRLF)
   Beep(1000, 5000)
   Exit
EndIf

;Read and Write data
;to be used with CH341ReadI2C and CH341WriteI2C:
$i2c_addr = 85  ;b: 0101'0101 (I2C: 1010'101*, *=R/W bit)
;to be used with CH341ReadI2C and CH341WriteI2C:
$i2c_B1 = 0   ;b: 0000'0000
;to be used with CH341ReadI2C:
$sBYTE_r4 = DllStructCreate ("BYTE[4]" )
$pBYTE_r4 = DllStructGetPtr($sBYTE_r4)
;to be used with CH341WriteI2C:
$i2c_B2 = 231   ;b: 1110'0111

;to be used with CH341StreamI2C
$rlen = 0
$sBYTE_r = DllStructCreate ("BYTE[8]" )
$pBYTE_r = DllStructGetPtr($sBYTE_r)
$wlen = 3
$sBYTE_w = DllStructCreate ("BYTE;BYTE;BYTE;BYTE;BYTE;BYTE;BYTE;BYTE" )
DllStructSetData ( $sBYTE_w, 1, 170 ) ;b: 1010'1010 (I2C: 1010'101*, *=R/W bit) - I2C slave address
DllStructSetData ( $sBYTE_w, 2, 0 )  ;b: 0000'0000
DllStructSetData ( $sBYTE_w, 3, 231 ) ;b: 1110'0111
DllStructSetData ( $sBYTE_w, 4, 0 )
DllStructSetData ( $sBYTE_w, 5, 0 )
DllStructSetData ( $sBYTE_w, 6, 0 )
DllStructSetData ( $sBYTE_w, 7, 0 )
DllStructSetData ( $sBYTE_w, 8, 0 )
$pBYTE_w = DllStructGetPtr($sBYTE_w)
MsgBox(0, "PAUSED", "Click OK to continue with the tests")


ConsoleWrite("WRITE TEST: START" & @CRLF)
;CH341WriteI2C
$aResult = DllCall($dll, "BOOL", "CH341WriteI2C", "BYTE", $id, "BYTE", $i2c_addr,  "BYTE", $i2c_B1,  "BYTE", $i2c_B2)
If  $aResult[0] Then
   ConsoleWrite("CH341WriteI2C: OK" & @CRLF)
   ConsoleWrite("  Param: $id="& $id & ", $i2c_addr=" & $i2c_addr & ", $i2c_B1=" & $i2c_B1 & ", $i2c_B2=" & $i2c_B2 & @CRLF)
Else
   ConsoleWrite("CH341WriteI2C: Error" & @CRLF)
   ConsoleWrite("  Param: $id="& $id & ", $i2c_addr=" & $i2c_addr & ", $i2c_B1=" & $i2c_B1 & ", =$i2c_B2" & $i2c_B2 & @CRLF)
   Beep(1000, 5000)
   Exit
EndIf
MsgBox(0, "PAUSED", "Click OK to continue with the tests")


;CH341StreamI2C writing
$rlen = 0
$wlen = 3
$aResult = DllCall($dll, "BOOL", "CH341StreamI2C", "BYTE", $id, "BYTE", $wlen, "ptr", $pBYTE_w, "BYTE", $rlen,  "ptr", $pBYTE_r)
If  $aResult[0] Then
   ConsoleWrite("CH341StreamI2C: OK" & @CRLF)
   ConsoleWrite("  Param: $id="& $id & ", $wlen=" & $wlen & ", $rlen=" & $rlen & _
   ", $sBYTE_w1,2,3,4=" & DllStructGetData($sBYTE_w, 1) & _
   "," & DllStructGetData($sBYTE_w, 2) & _
   "," & DllStructGetData($sBYTE_w, 3) & _
   "," & DllStructGetData($sBYTE_w, 4) & _
   ", $sBYTE_r=" & DllStructGetData($sBYTE_r, 1) & @CRLF)
Else
   ConsoleWrite("CH341StreamI2C: Error" & @CRLF)
   ConsoleWrite("  Param: $id="& $id & ", $wlen=" & $wlen & ", $rlen=" & $rlen & _
   ", $sBYTE_w1,2,3,4=" & DllStructGetData($sBYTE_w, 1) & _
   "," & DllStructGetData($sBYTE_w, 2) & _
   "," & DllStructGetData($sBYTE_w, 3) & _
   "," & DllStructGetData($sBYTE_w, 4) & _
   ", $sBYTE_r=" & DllStructGetData($sBYTE_r, 1) & @CRLF)
   Beep(1000, 5000)
   Exit
EndIf
MsgBox(0, "PAUSED", "Click OK to continue with the tests")
ConsoleWrite("WRITE TEST COMLETE" & @CRLF)


ConsoleWrite("READ TEST: START" & @CRLF)
;CH341ReadI2C
$aResult = DllCall($dll, "BOOL", "CH341ReadI2C", "BYTE", $id, "BYTE", $i2c_addr,  "BYTE", $i2c_B1,  "PTR",  $pBYTE_r4)
If  $aResult[0] Then
   ConsoleWrite("CH341ReadI2C: OK" & @CRLF)
   ConsoleWrite("  Param: $id="& $id & ", $i2c_addr=" & $i2c_addr & _
   ", $i2c_B1=" & $i2c_B1 & _
   ", $sBYTE_r4=" & DllStructGetData($sBYTE_r4, 1) & @CRLF)
Else
   ConsoleWrite("CH341ReadI2C: Error" & @CRLF)
   ConsoleWrite("  Param: $id="& $id & ", $i2c_addr=" & $i2c_addr & _
   ", $i2c_B1=" & $i2c_B1 & _
   ", $sBYTE_r4=" & DllStructGetData($sBYTE_r4, 1) & @CRLF)
   Beep(1000, 5000)
   Exit
EndIf
MsgBox(0, "PAUSED", "Click OK to continue with the tests")


;CH341StreamI2C reading similar to CH341ReadI2C
$rlen = 1
$wlen = 2 ;I2C slave address and one byte
$aResult = DllCall($dll, "BOOL", "CH341StreamI2C", "BYTE", $id, "BYTE", $wlen, "ptr", $pBYTE_w, "BYTE", $rlen,  "ptr", $pBYTE_r)
If  $aResult[0] Then
   ConsoleWrite("CH341StreamI2C: OK" & @CRLF)
   ConsoleWrite("  Param: $id="& $id & ", $wlen=" & $wlen & ", $rlen=" & $rlen & _
   ", $sBYTE_w1,2,3,4=" & DllStructGetData($sBYTE_w, 1) & _
   "," & DllStructGetData($sBYTE_w, 2) & _
   "," & DllStructGetData($sBYTE_w, 3) & _
   "," & DllStructGetData($sBYTE_w, 4) & _
   ", $sBYTE_r=" & DllStructGetData($sBYTE_r, 1) & @CRLF)
Else
   ConsoleWrite("CH341StreamI2C: Error" & @CRLF)
   ConsoleWrite("  Param: $id="& $id & ", $wlen=" & $wlen & ", $rlen=" & $rlen & _
   ", $sBYTE_w1,2,3,4=" & DllStructGetData($sBYTE_w, 1) & _
   "," & DllStructGetData($sBYTE_w, 2) & _
   "," & DllStructGetData($sBYTE_w, 3) & _
   "," & DllStructGetData($sBYTE_w, 4) & _
   ", $sBYTE_r=" & DllStructGetData($sBYTE_r, 1) & @CRLF)
   Beep(1000, 5000)
   Exit
EndIf
MsgBox(0, "PAUSED", "Click OK to continue with the tests")


;CH341StreamI2C reading
$rlen = 8
$wlen = 1
$aResult = DllCall($dll, "BOOL", "CH341StreamI2C", "BYTE", $id, "BYTE", $wlen, "ptr", $pBYTE_w, "BYTE", $rlen,  "ptr", $pBYTE_r)
If  $aResult[0] Then
   ConsoleWrite("CH341StreamI2C: OK" & @CRLF)
   ConsoleWrite("  Param: $id="& $id & ", $wlen=" & $wlen & ", $rlen=" & $rlen & _
   ", $sBYTE_w1,2,3,4=" & DllStructGetData($sBYTE_w, 1) & _
   "," & DllStructGetData($sBYTE_w, 2) & _
   "," & DllStructGetData($sBYTE_w, 3) & _
   "," & DllStructGetData($sBYTE_w, 4) & _
   ", $sBYTE_r=" & DllStructGetData($sBYTE_r, 1) & @CRLF)
Else
   ConsoleWrite("CH341StreamI2C: Error" & @CRLF)
   ConsoleWrite("  Param: $id="& $id & ", $wlen=" & $wlen & ", $rlen=" & $rlen & _
   ", $sBYTE_w1,2,3,4=" & DllStructGetData($sBYTE_w, 1) & _
   "," & DllStructGetData($sBYTE_w, 2) & _
   "," & DllStructGetData($sBYTE_w, 3) & _
   "," & DllStructGetData($sBYTE_w, 4) & _
   ", $sBYTE_r=" & DllStructGetData($sBYTE_r, 1) & @CRLF)
   Beep(1000, 5000)
   Exit
EndIf
MsgBox(0, "PAUSED", "Click OK to finish")
ConsoleWrite("READ TEST COMLETE" & @CRLF)

The console output should like this if everything works fine (no I2c devices connected):
DllOpen: OK
CH341OpenDevice: OK
CH341SetStream: OK
  Param: $id=0, $iMode=0
WRITE TEST: START
CH341WriteI2C: OK
  Param: $id=0, $i2c_addr=85, $i2c_B1=0, $i2c_B2=231
CH341StreamI2C: OK
  Param: $id=0, $wlen=3, $rlen=0, $sBYTE_w1,2,3,4=170,0,231,0, $sBYTE_r=0x0000000000000000
WRITE TEST COMLETE
READ TEST: START
CH341ReadI2C: OK
  Param: $id=0, $i2c_addr=85, $i2c_B1=0, $sBYTE_r4=0xFF000000
CH341StreamI2C: OK
  Param: $id=0, $wlen=2, $rlen=1, $sBYTE_w1,2,3,4=170,0,231,0, $sBYTE_r=0xFF00000000000000
CH341StreamI2C: OK
  Param: $id=0, $wlen=1, $rlen=8, $sBYTE_w1,2,3,4=170,0,231,0, $sBYTE_r=0xFFFFFFFFFFFFFFFF
READ TEST COMLETE


And here are the pictures showing what's happening on the wire:
First write test (CH341WriteI2C)

Second write test (CH341StreamI2C)

First read test (CH341ReadI2C)

Second read test (CH341StreamI2C)

Third read test (CH341StreamI2C)
Settings for all pictures (RIGOL DS1052E):
Analog Ch  State   Scale    Position   Coupling  BW Limit  Invert
CH1        On      2.00V/   -4.00V     DC        Off       Off
CH2        On      2.00V/   0.00uV     DC        Off       Off

Analog Ch  Impedance   Probe
CH1        1M Ohm      1X
CH2        1M Ohm      1X

Time    Time Ref    Main Scale    Delay
Main    Center      200.0us/      840.0000us

Trigger  Source      Slope    Mode      Coupling     Level    Holdoff
Edge     CH1         Falling  Normal    DC            1.68V   500ns

Acquisition    Sampling    Memory Depth    Sample Rate
Normal         Realtime    Normal          1.000MSa    

Sunday, February 14, 2016

Qidi Avatar IV - heat chamber

Printing ABS works best using a heat chamber, and while the Qidi Avatar IV has a top cover there's still very much air flow. Adding an extra cover will keep the heat inside. Warning: This might cause overheat damaging the printer (electronics, motors, belts). But for energy-conserving and warp-free printing you might ignore the risks, there's also much less odor.
There are still gaps that allow air to circulate,  the original cover isn't air-tight anyway.

Here's what it looks like:
Heat chamber

Detail view of one side
The files are on github. The chamber consists of two sides, plus a copier transparency all glued together and then glued to the original cover using casein glue/wood glue.

Qidi Avatar IV - Vholdr Contour camera mount and printing videos


On the right side is the camera mount, the print is almost complete at this point:
Files: github

The camera mount is constructed with IceSL, a GPU accelerated editor and slicer. It has very fast (much faster then OpenJSCAD which is much faster than OpenSCAD) and has cool features like changing numbers with the mouse wheel - and it has a few problems like GPU timeouts on complex objects.
 
Here's a super short video (8x speed) taken with this camera mount, in the beginning there's extra light, then it's only the build-in blue LEDs of the Qidi Avatar IV (which is not bright enough).

Qidi Avatar IV - Unboxing

Source: www.alibaba.com, Ruian Qidi Technology Co., Ltd.
Total processing time (from inquiry to delivery (DHL Express)): 20 days
And here are the unboxing pictures:
Untouched

Unwrapped
Damaged outside - perfect inside (not shown)

Removed the strings and L-shape cardboard
Already removed a sheet of white foam (2cm thick) from the top.


The contents of the first box and the two filaments

The next layer of boxes opened

Contents of these boxes, with extras not mentioned in the product description:
USB card reader, extra fan for PLA, tools box, glue, scraper, extra power electronics

Last boxes content: acrylic glass parts

Assembled top cover, door and windows

Extra fan for PLA
It failed after a few weeks, and got replaced.


Filament: Brown PLA, yellow ABS

Assembled everything (except front door)

Different hinges, waiting for a replacement.

The front door can be opened almost 180° with the hinge type on the left.
A few weeks later it arrived.

Unboxing complete.